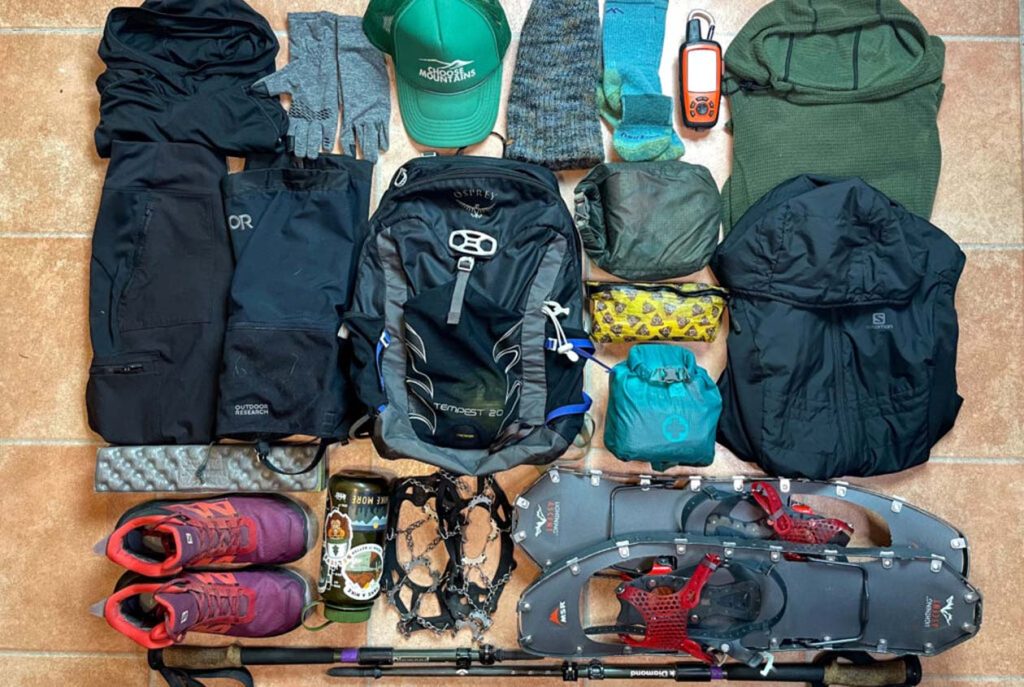
January in Amsterdam is the quietest and most enchanting memory I hold of the city. With fewer tourists and tranquil streets, pigeons occasionally flutter past the misty canals, and even the wind carries a poetic charm. But January is also one of the coldest and dampest times of year in the Netherlands. Without the right gear, a trip here can quickly become a scramble against the elements. I’d like to share everything I packed for my winter visit—from clothing and photography gear to daily essentials and weather hacks—in hopes it provides useful reference for anyone planning a trip during this season.
1. January Weather in Amsterdam: Don’t Be Fooled by the Numbers
Temperature-wise, January in Amsterdam isn’t “extremely cold,” with average temperatures ranging from 1°C to 6°C (33°F to 43°F). On paper, that sounds gentler than winters in Beijing, Harbin, or northern regions. But the real challenge isn’t the temperature—it’s the humidity, wind, and persistently gloomy weather.
The air is constantly moist, and if your clothing lacks proper waterproofing, even a light drizzle can soak through and chill you to the bone. The wind is particularly mischievous—especially near canals or open areas, it sneaks into collars and up pant legs. That’s why when it comes to gear, you need windproofing, waterproofing, warmth, and flexibility—all equally important.
2. Layered Outfit Strategy: Adapting From Inside Out
1. Base Layer (Next-to-skin warmth)
Every single day of the trip, I started with reliable, functional base layers that made a noticeable difference. I opted for a set made of Merino wool—thin, breathable, and surprisingly warm even when temperatures dipped close to freezing.
- Top: A snug long-sleeve Merino wool base topped with a thick wool sweater for additional warmth.
- Bottom: Merino wool leggings, sometimes layered under jeans or fleece-lined thermal pants, depending on the day’s agenda.
Unlike traditional cotton, Merino wool excels in performance—it’s naturally odor-resistant, regulates body temperature efficiently, and dries quickly. Indoors, when I took off outer layers, I still felt cozy without overheating or feeling sticky. Whether I was browsing bookstores or sipping coffee in a canal-side café, these base layers ensured consistent comfort.
2. Mid Layer (Insulation)
The mid layer is your adaptive zone—it’s all about insulation without bulk. Amsterdam’s interiors, like cozy cafés, trams, and museums, are typically well-heated, so I opted for lightweight insulation pieces that I could easily remove. A packable down vest or a soft fleece jacket served me perfectly.
These mid layers added warmth when I needed it—like on breezy canal-side walks—but weren’t cumbersome to stuff into a tote bag or backpack when I stepped indoors. One windy afternoon while cycling, my fleece layer kept the chill off without restricting movement. It also doubled as a pillow during long train rides, proving both practical and comfortable.
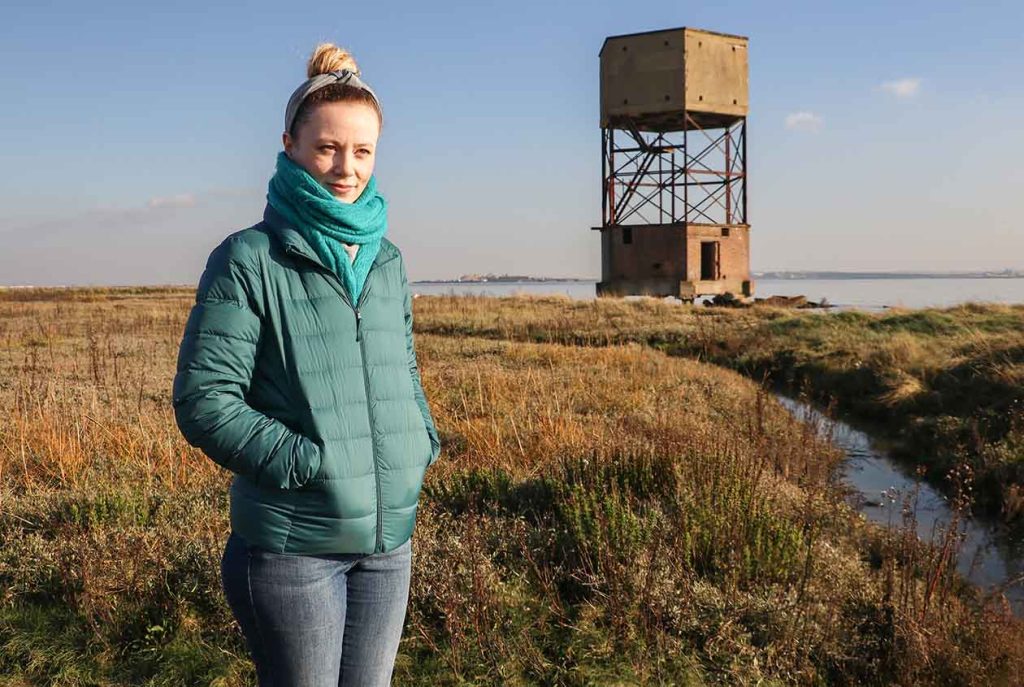
3. Outer Layer (Protection)
In Amsterdam’s unpredictable winter weather, having a waterproof and windproof outer layer matters more than investing in a single, heavy down coat. I wore a 3-in-1 shell jacket: the exterior was a hard-shell rain and windproof layer, while the inside featured a detachable, insulated down lining. I could wear them together on freezing days or individually depending on the temperature.
This combo allowed maximum flexibility. On a sunny but cold day, I wore just the outer shell with my wool sweater. During rain showers or sleet, I snapped the two layers together and stayed completely dry and warm. I also chose dark colors like navy and charcoal—not only did they hide any city grime or splashes, but they added visual contrast against Amsterdam’s grey skies, making my travel photos more striking.
3. Don’t Overlook the Accessories: Small Items, Big Difference
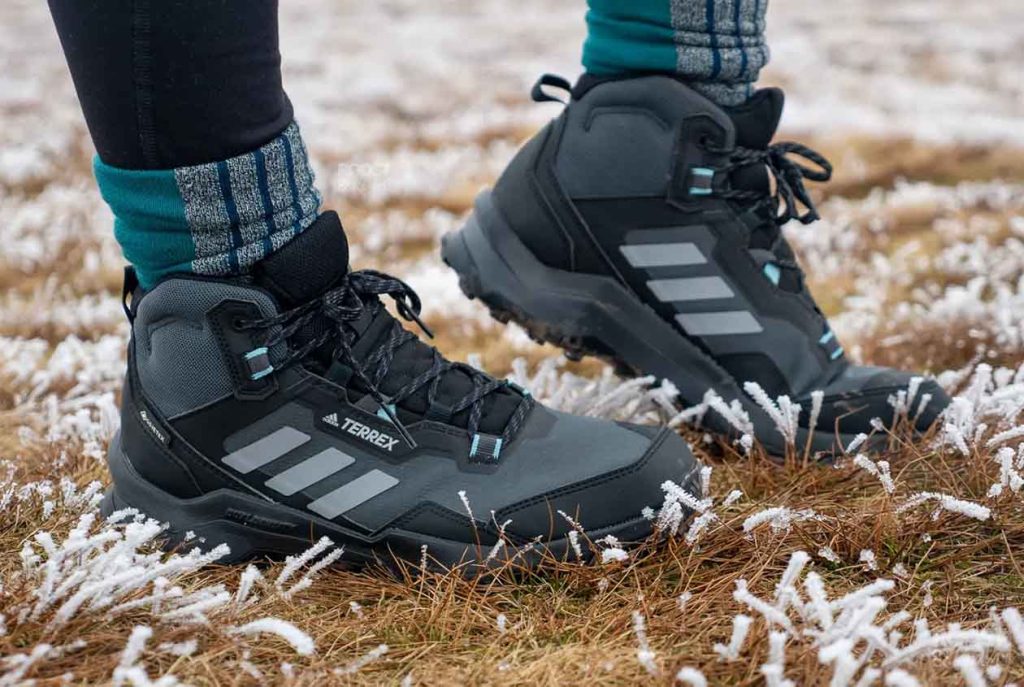
1. Waterproof Shoes & Wool Socks
Footwear can make or break your day, especially in a walkable city like Amsterdam. While rubber boots offer waterproofing, they’re heavy and tiring for long distances. I chose Gore-Tex hiking shoes instead—lightweight, waterproof, breathable, and with solid grip on wet cobblestone streets.
To keep my feet warm, I paired the shoes with thick wool socks every day. Wool doesn’t just trap heat; it wicks away moisture, keeping your feet dry even if you sweat or get caught in drizzle. Standing in line for the Van Gogh Museum or strolling across damp bridges, warm feet kept me focused on the experience—not the cold.
2. Warm Hat, Scarf, and Gloves
Cold wind is a given, especially near the canals. I wore a knit beanie with a soft fleece lining that covered my ears completely—essential for blocking out the icy breeze. I also brought a backup in case one got wet.
My scarf of choice was an oversized, shawl-style wool scarf. It doubled as a wrap on planes or long tram rides, and once even worked as a makeshift cushion when we sat down on a chilly stone bench. For gloves, I made sure they were waterproof and touchscreen-compatible, so I didn’t have to choose between taking photos and keeping warm. Fingerless gloves or ones without touch capability just aren’t practical in winter travel.
3. Spare Rain Gear & Warmers
Even though my jacket was waterproof, I always carried a small, foldable umbrella in my bag. Amsterdam’s weather can shift suddenly—from snow flurries to drizzle in minutes—and this backup came in handy several times.
Additionally, I packed a handful of disposable heat patches (like the ones popular in Japan). On especially cold evenings, like when I paused to enjoy a live street performance at Dam Square, placing one on my lower back or inside my coat gave me just enough warmth to stay outside longer. They’re lightweight, affordable, and a game-changer for comfort in freezing winds.
4. Photography & Electronics Protection
Amsterdam in January may be dim, but that’s exactly when the canals, reflections, and streetlights shine brightest—transforming the city into a painterly dreamscape. To capture this beauty without lugging around a heavy setup, I brought a compact mirrorless camera paired with a 35mm prime lens. It was light enough for all-day use yet sharp enough to catch the glow of lamplight on wet cobblestones and misty canal waters.
However, cold and moisture pose serious risks to electronic devices. I made sure my camera bag was both waterproof and insulated, with padded compartments to protect delicate equipment from jostling and the elements. Each evening, I stored my camera and lenses with a couple of silica gel packs to absorb any moisture and prevent fogging or condensation buildup.
For my phone—an indispensable tool for navigation and quick snapshots—I used a waterproof case that allowed full touchscreen use even in drizzle. I also recommend keeping devices close to your body to protect them from extreme cold. Don’t forget a reliable power bank: cold drains batteries alarmingly fast. My iPhone dropped from 70% to 20% in under an hour at -3°C while filming by the canals. A portable charger literally saved the day, keeping both my phone and camera ready for the next magical shot.
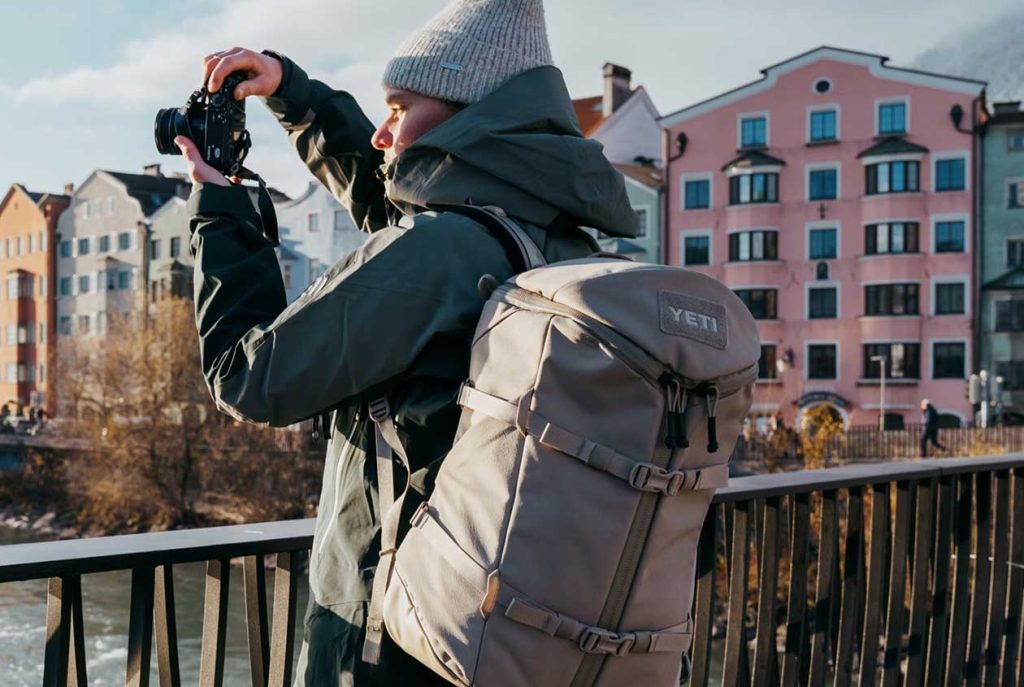
5. Daily Pack & Handy Essentials
To stay organized and comfortable during daily outings, I opted for a 20-liter lightweight city backpack. It had a water-resistant outer fabric and a breathable back panel with cushioned shoulder straps, which made a huge difference during long days of walking. The internal compartments were a lifesaver, keeping wet items away from electronics and making essentials easy to grab in the cold.
I always kept a thermos filled with hot tea or water in a side pocket—not only for warmth but because many Amsterdam cafés are happy to refill it for free. My mini first-aid kit included cold medicine (just in case), band-aids for blisters, and painkillers for unexpected aches after full days of walking and cycling.
One item I almost forgot but ended up using daily was a universal travel adapter. The Netherlands uses the Europlug (Type C), and many old cafés and hostels have limited outlets. A compact adapter with multiple USB ports let me charge my phone, power bank, and camera battery simultaneously without juggling plugs.
6. Suggested Daily Itinerary & Gear Matching
Since January days are short (sunrise around 8:45, sunset around 16:30), I kept each day’s schedule simple. I alternated between indoor and outdoor activities to avoid fatigue and cold exposure.
- Morning: Museum or local market → warm layers + rain gear
- Lunch: Dine indoors (try Dutch beef stew)
- Afternoon: City walks or short bike rides → scarf & hat essential
- Evening: Canal-side night photography → camera care + hand warmers
- Night: Back to the hotel or a relaxing hot bath
7. A Few of My Takeaways
- Always check the weather forecast—it changes fast in Amsterdam. Make last-minute gear tweaks accordingly.
- Don’t prioritize “looking good.” In winter, functionality and comfort are key.
- Use layered packing in your suitcase—easy access and organization matter when changing often in damp weather.
- Bring a small waterproof seat pad. Handy when you need to rest outdoors or wait for events.
- Avoid disposable rain ponchos—they don’t withstand Amsterdam’s wind and flip around annoyingly.
Equip Yourself Against the Cold, Discover the City’s Warmth
Amsterdam in January is cold and damp—but that’s part of its unique charm. There’s no summer crowd, no spring flower buzz. Just misty streets in the morning, glowing canals at dusk, and candle-lit cafés waiting for you to step inside.As long as you pack wisely and plan well, every winter traveler can find their own kind of warmth in this city.